
Silent Bloom
- Julian Schenker
- Sep 15, 2025
- 15 min read

Updated: May 26
A collection of in-depth looks at the modeling and layout process I have been doing for Silent Bloom.
04/20/26
This shot is one that I knocked out last night. It wasn't originally on the shot list, however Silent Bloom is in desperate need of insert shots so this is one I created for that purpose. The shot is not too complex, it is just a kitbash of different photoscans and downloaded assets. For the hills and mountains in the distance, I used 2D cards. To blend the mix of 3D elements and 2D cards, I applied a layer of volumetrics to the scene. Since the world lighting is simple ambient light, I decided to really amplify the effect that the train lights have on the environment by exaggerating the light intensity and area of effect. Due to the lightweight construction, the render times for this sequence was just a matter of a minute per frame!
04/20/26
The breakdown of this shot is honestly not too complex. I posed a character in 3D space and projected our original plate footage of Sofia Vega onto the digital double. I then proceeded to dress the projected footage with a mix of 3D plant assets as well as 2D cards. To help integrate the elements onto the footage, I replaced Sofia's hair with a digital groom.
The last portion was rotoscoping out a portion of leaves on the face so I could incorporate some of Sofia's dying performance into the shot and add a little humanity back.


04/20/26
Today I remade the lighting and compositing for the San Felipe church opener. I wanted to match the lighting better to the rest of the shots in this sequence.
Things to note:
Lighting has been rotated to feel dynamic and less flat
Volumetric fog has been removed
Cards with light rays added to environment
Boosted contrast
Accurate depth of field
04/19/26
This weekend I have been working on CG filler shots. Firstly, I finalized the establishing street sign shot for San Felipe street. I wasn't appreciating how stiff and washed out the shot was looking so I went back in and added updates to the lighting as well as adding some slight dust animations in the background and foreground. Here is the after followed by the before.

I also created a fully CG POV shot to be inserted during the final scenes between Jo and the priest. I wanted to show through the environment that Jo isn't the first person that the priest has killed. As such, I left a pile of scattered needles along the ground. I had wanted to add bones and mummified body parts along the ground too, but I figured that would be too much.
04/12/26
This past week was shoot week for Silent Bloom. A lot of good footage was captured, but the most pressing item for me right now is fleshing out environments for the two newest blue-screen shots: A rack-focus shot between the priest and Jo and a wide shot of the priest.
For the rack-focus shot, it started with two separate plates: One of the priest and one of Jo.


I then created a custom environment in Blender that matched the aesthetic style from our Unreal Engine file from set.


From there it was as simple as just color matching all 3 clips to each other as well as playing with depth of field and scale of Jo.
For the next shot, the method for creation is very similar. I started with a plate from set and built the environment around it.

In this case I wanted to preserve as much as the actual set as I could. I ended up keeping almost all of the blue--screen elements.
For the environment, I used the same environment as before, but changed the set dressing to better frame the same and also changed the lighting setup from one sun light to multiple strategically placed area lights for more control.

04/4/26
Big comp updates for this week. This past week I had to pivot and I have spent the last few days updating compositing for Silent Bloom. Firstly I will start with the shot that starts it all off.
I found this to be a pretty easy shot to work on. I ended up tracking the CG shot and then parenting the real footage to the CG track.
1080HD environment plates combined with keyed live action footage.
Updated blue screen key
Updated color grading
Updated depth of field
Updated contrast
This is just a slap comp for class 5 check-in. BUT! Now it is using the full 1080 CG footage.
1080HD environment plates combined with keyed live action footage
Updated color grading
Updated depth of field
Updated contrast
This shot is coming along nicely as well. I need to tone down the dust as well as making sure that she doesn't go out of frame.
1080HD environment plates combined with keyed live action footage.
Updated blue screen key
Updated color grading
Updated depth of field
Updated contrast
03/22/26
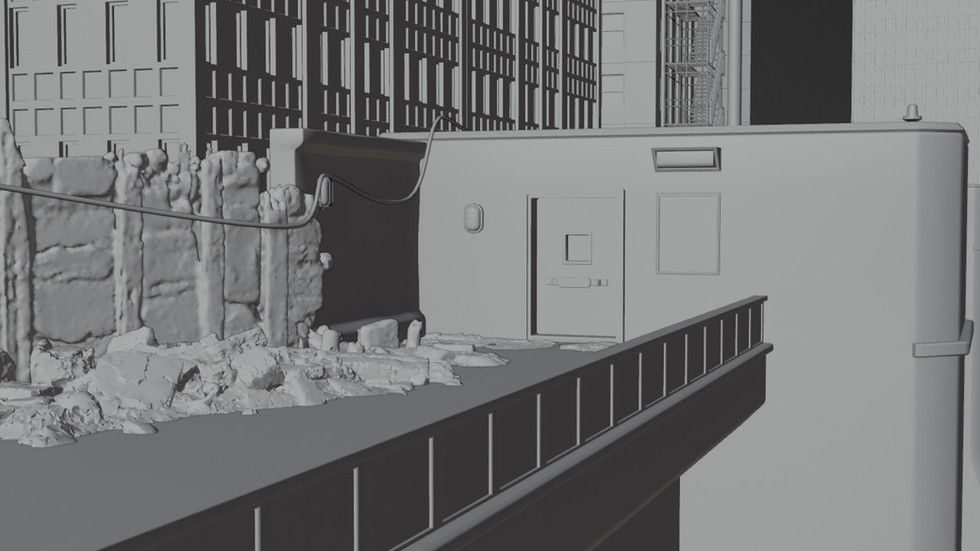
Here is the finalized environment for the train platform sequence. This has been probably my favorite scene to work on for Silent Bloom. I loved getting to explore volume and the way darkness plays with framing. Now it is up to our compositor to fully bring this scene to life.
Things to note:
Train Car
Fixed normals on train
Updated windows shaders
Updated metal shaders
Foliage
Improved foliage density
More coherent foliage color mapping
Addition of fern and new ivy assets
Removed some bushes from left side
Environment
New train car added to left side
Level of destruction increased on the roof
New textures added to walls and ceiling
03/05/26
Here is an update on the train platform. Unfortunately there is a shader UV issue causing the roughness map to slide around on the windows so I will have to rerender this sequence. However I am much more pleased with the level of detail on the plants and textures in the scene.
03/02/26
This week I have been working on finalizing environments and rendering out high resolution EXR sequences for use in compositing. A big challenge for me has been working to optimize render times. It has been a delicate back-and-forth of tweaking sample amounts and layers to see how much time I can shave off without impacting the final product. Unfortunately these are not the final color grades for these sequences.
Things to note:
Removal of leaf animations to reduce noise and render time
Tweaks to leaf shader to allow for quicker render time
Things to note:
Updated textures to the church
Changed tree types to better match real-world reference
02/22/26
This weekend I have been working on finishing up the environments for the Albuquerque sequence. Here are the early looks at the environments, before I shipped these sequences off to our compositor.

For the Albuquerque welcome sign, I went back after the fact to add some more details, including:
Bullet decals in the sign
Better foliage and trees
Improved background plate for the Albuquerque
Added leaf cover to the buildings
Worked on the color grading
Brighter lighting
02/19/26
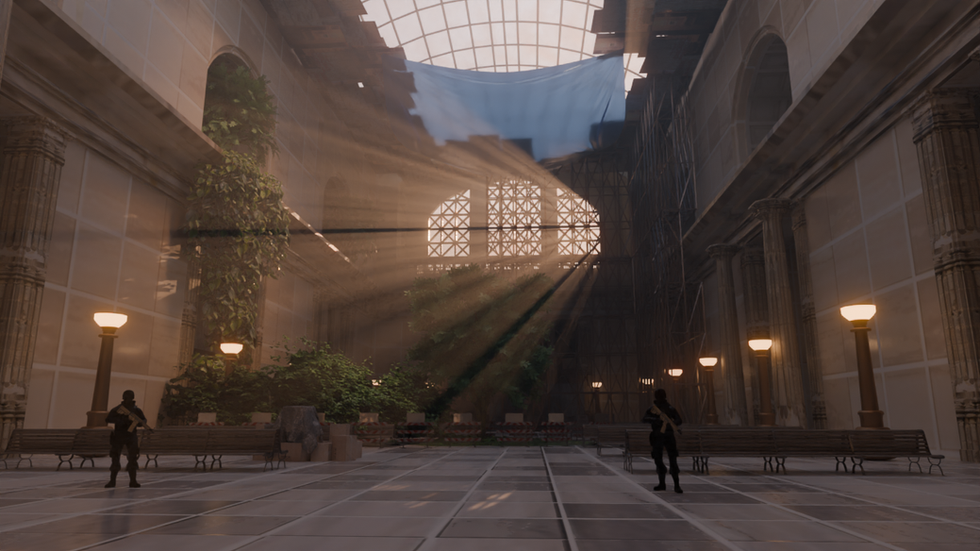
These last few days I have been working on "finalizing" the Chicago train station environments, as well as the church intro. Firstly I want to show off a compilation of all three station shots in a sequence:
The above sequence is not cut to the length of the film shots, it is more of a test to make sure the environments are feeling cohesive. Now I will show the individual clips with their changes.
Chicago opening shot changes
Removed foliage that was clipping along the wall trim
Simplified soldier animations
Reduced wind animations
Removed flag on back wall
Guard insert shot
Started building up the sequence for the guard insert shot
Improved texture fidelity to up realism of CG models
Added decals to windows to make them feel more exposed and weathered
Here is a small sample of the church sequence.
Church intro shot
Updated color pallette
Reduced sizing on the cacti
Removed cloud
Boosted contrast to allow for more separation between church and sky
Added back in dusty haze
02/18/26
I have spent many hours upping the quality for this shot. There are a few experimental changes that I made for this iteration that will later be removed: The guard standing over the executed corpse will most likely be taken out and the exposed city in the background may be removed.
02/17/26
I spent all evening trying to hone the look of this environment. I am much more pleased with the direction it is heading. I will show my progress and then list the changes below:
Foliage
Changed leaf texture and material to be an animated sycamore branch
Added ferns in the foreground
Added vines to the guard outpost to better ground it
Added more small ground cover to floor
Lighting
Added ambient light in the foreground to better emphasize guard outpost and other elements
Changed color grading to better match photo reference
Added a second light in the guard outpost to better emphasize the second guard
Models and Shaders
Added wind animation to the tarp
Added flag to back wall
Added grafiti to guard outpost
Added more depth to guard outpost shader by increasing bump and displacement
Added a sifting sand animation coming from the roof
02/16/26
This week I have continued iterations upon the church environment. I will show my progress and then list changes below:
Things to note:
Foliage
Tree assets from Poly Haven were updated to include some light wind animations that I created using shape keys
Cacti were added to make the environment feel more locationally accurate
Updated textures on the walls and facades to help blend the assets and base model
Upped density and dispersion of shrubs and grasses
Environment
Added cloud backdrop to scene
Removed old cars and "old world" objects from foreground
Added mission bell to church facade
Animation
Cloud backdrop given animation to make scene feel less static
Camera given a dynamic dolly motion along with a tilt upward
Plants given more subtle animations
02/11/26
Today I spent time working on setting up a better environment for the church. Just like with the train station, I have been replacing stand-in foliage and props for higher quality assets.
02/09/26
This week I have been working on lighting and asset updates to the Chicago station. Here is the current version, a list of changes that were made are listed underneath:
Things to note:
New foliage
Tree assets from Poly Haven were used to populate the scene
Moss added to the top of the wall trim, ceiling beams
Updated textures on the walls and ceiling to help blend the assets and base model
New Lighting
Lighting direction changed to better match the blue screen footage
Lighting method changed from HDRI & sun lamp to a Blender sky environment
Atmosphere and fog levels changed to be less extreme
Models and Textures
Added statues to ceiling trim
Decimated part of ceiling trim
Added skyscrapers to the world environment
Changed window frame textures to look more weathered
Reworked wood and stone textures to feel more photorealistic
02/03/26
I have been working on building up set pieces for the composite shots. Please ignore the bad composites of the footage, I am just using it as placeholders so I know where to focus my efforts.
So far, the biggest issue has been filling the space in the scene up and making it all feel cohesive and interesting, but not too overwhelming.
01/29/26
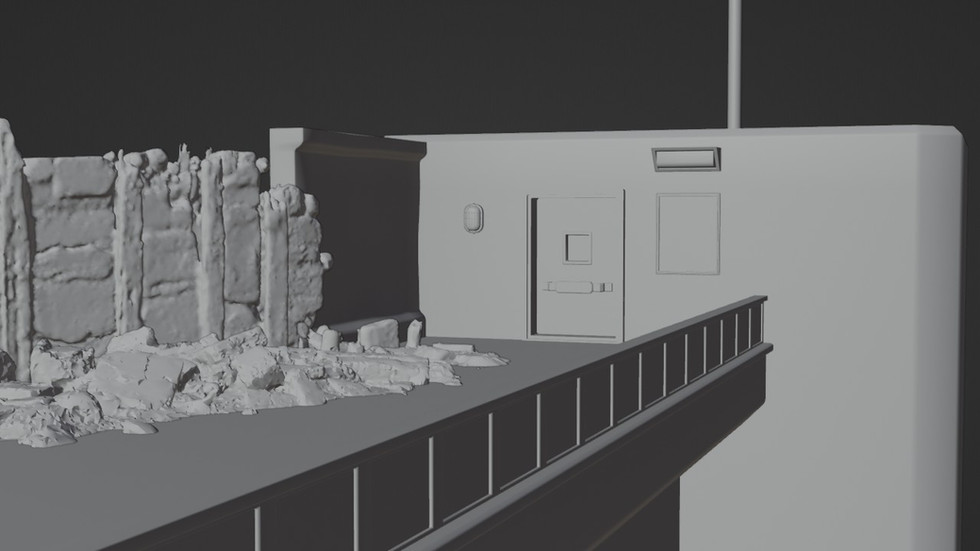
I have been doing work to prep the Chicago station set for compositing. I decided to add a checkpoint for the station guards. The idea being that if there is a biohazard issue, the station can be shut down.
Unfortunately, until I get the bluescreen footage, I won't be able to fully fine tune the layout and lighting.
01/27/26
Here is the most up to date version of the train platform render!
01/25/26
Silent Bloom had a shoot day for blue screen footage this past week! I have been spending time building up digital environments. I want to show off some iterations I have been working on for the train station platform. Please bear in mind that I don't have the fully keyed blue screen data, so these renders are just rough tests.
The main challenge is trying to match the motion of the practical lights to the lights of the digital train. Here is the first test that I tried. Notable issues present here are the timing of the train, the fact that the lights don't match, tracking issues and texture problems.
Here is the next iteration. I better-timed the train motion, as well as blocking out some of the windows to better match the lights on our actor. I also updated some of the textures on the train, as well as the lighting.
My final test was this iteration where I tried opening up the environment. This idea got shot down, but it definitely did give me inspiration on how to enhance the original shot. However this test is utilizing the FBX camera data that we recorded live during our virtual production blue screen shoot. So now the camera is much more smooth.
01/21/26
I have a few updates from the past few weeks. Firstly, I have been working on refining the Chicago train station, seeing as it'll now be using green-screen footage. I will post a before and after of the updated station. The upper image is the new and improved station, and the lower image is what I started with.


I also spent time working on the Withered models, trying to fill out the foliage on them. Here is a before and after of the model. The top image is the new and improved model, the bottom was the proposed idea from a few weeks back. I used a moss layer to fill out the Withered between the ivy and the base mesh.


01/11/26
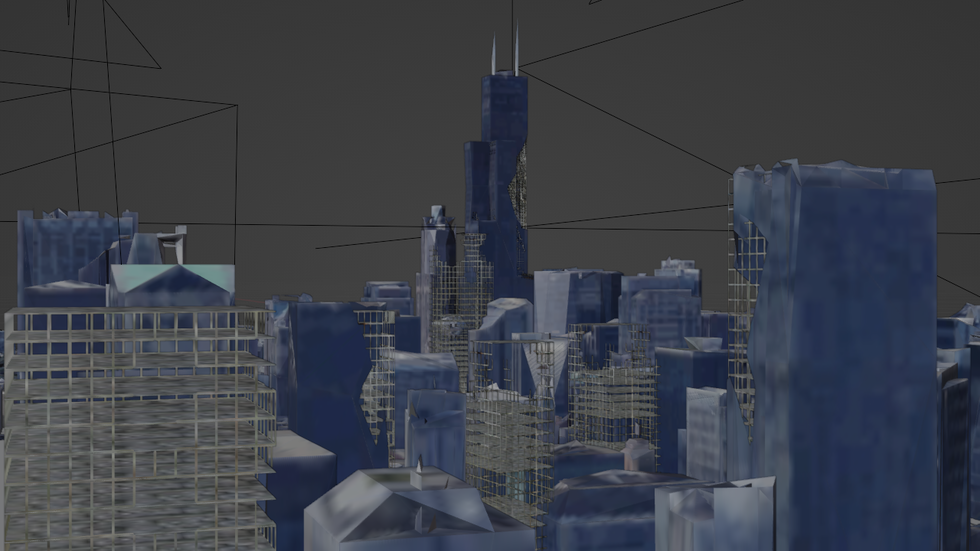
This weekend I have been working on more customized buildings for the Chicago digital set. I used this image of Chicago as reference for what style of buildings to create.

Once I had a few designs to work from, I then worked on building up a few low poly models for me to project images of real buildings onto. Once I had these done, I modeled simple interior wall and floors so that I could boolean out parts of the buildings to make them feel ruined and collapsing.


01/7/26
Today I have been doing work on reworking the models for the "Withered". Firstly, I removed the older leaf model and replaced it with the high quality Poison Ivy leaves that I created for the Ivy spread effect. I then reduced the size of the pustules on the 3D model. Lastly I did some texture painting to make the skin of the Withered look mossy and overgrown. Here are the results from this first pass.


11/8/25
This week I have been working on creating a view of Chicago to be seen from out of Jo's window. To do this, I started with the Chicago asset that I downloaded from Turbosquid. I found a camera angle that I liked that shows a well-known Chicago landmark, and begun work on making the city look destroyed. I started with removing some towers to make the city silhouette feel more distinct. as well as booleaning out some of the buildings to make them feel decrepit. I then created interior scaffolding that the booleans would reveal. Finally, I added some bush and leaf photoscans to make the buildings feel overgrown.


Over winter break I will remodel this perspective of Chicago so that my team has a custom environment that is high-resolution. But for the sake of our animatic, this will do for now.
11/5/25
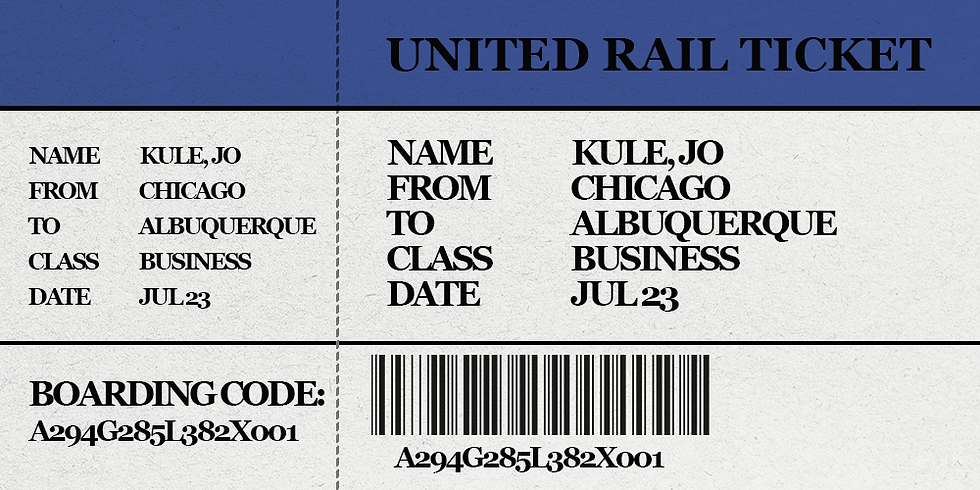
This week I have been working on more world building in the form of flyers and train tickets for the animatic. These are not as fleshed out as I would like but at least they will add more context for the viewer when they watch the animatic.

11/1/2025
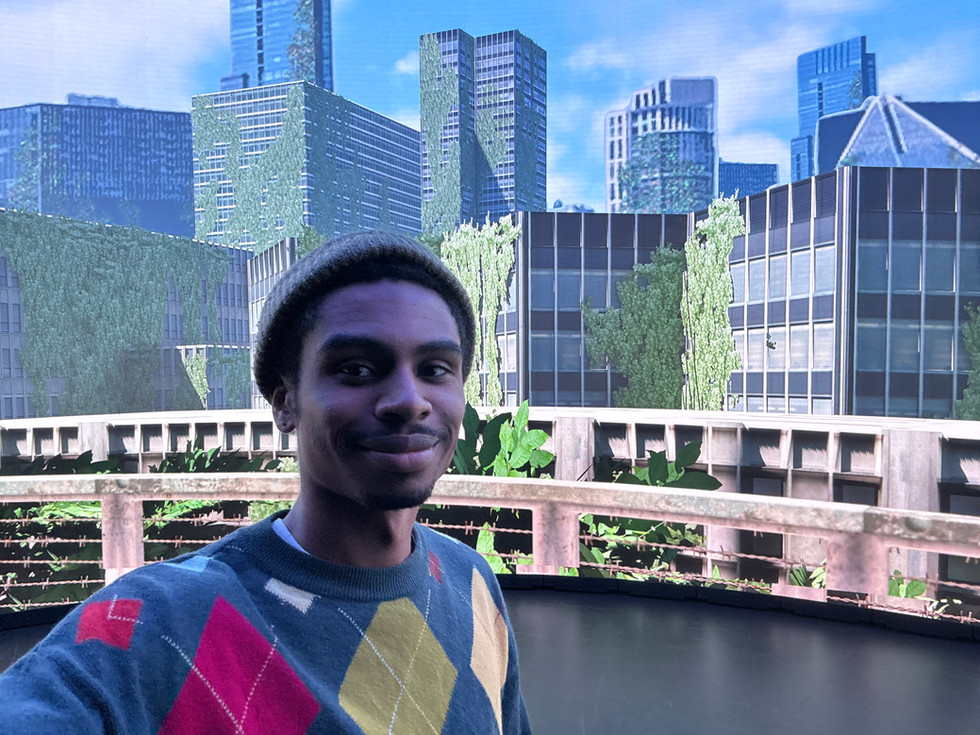
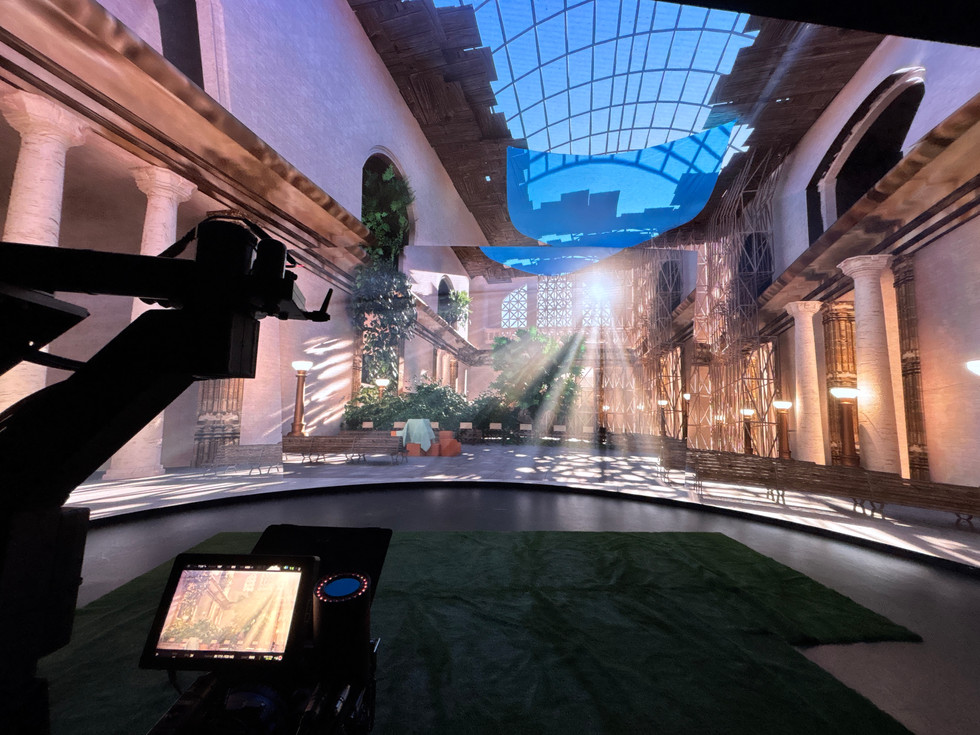
This past week my group and I went to SCAD's LED Volume stage to test our environments on the stage. To our relief, all of our files preformed as planned; optimized and smoothly. Here is a selection of documentation photos I took while on set.


10/26/25
I have been doing more iterations on the Ivy spreading effect. The current setback is that trying to force a Metahuman into Blender isn't a 1 to 1 with how Unreal's setup works. However since this effect will be used on a real actor (or at least a photoscan of our real actor), I am not too pressed about the results. My goal for the next few weeks is to iron out the animation of the plants as well as making higher quality assets.
10/25/25
This weekend I have been working on the Ivy infection spread effect. I want to add more variations to the leaves as I find them all too uniform and similar. I also want to work with the speed of the simulation. But I figure for now this will at least be a start.
I used this tutorial to learn how to create this effect: https://youtu.be/VDKXSLDqlgg?si=ZFE1KgJPM6zN081R
10/23/25
Today I have been working on changing the Withered assets to work better with Ben's Unreal Engine materials. Until recently, I had been using physical geometry to create the boils on the Withered. However, Ben had requested that the boil geometry be removed so that he could use a high-resolution material instead to create the effect of infected skin.
I also think that in removing the boils, it makes the shape language of the withered look more recognizably human. Here is a before and after of one of the Withered poses:


10/18/25
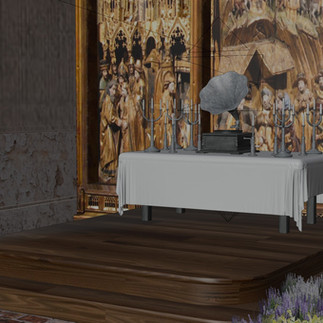
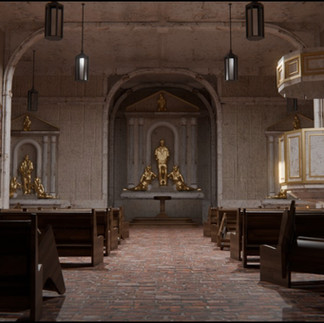
During the weekend, I worked on creating assets for our church environment. My professor had been pushing for there to be a tic, or distraction happening in the background to add further discomfort to the final scenes of the film. I had the sudden inspiration that maybe an old fashioned antagonist like the one for our film might be the type to precure and use a record player. I decided to model an alter with a gramophone, with the idea that while the final dialogue is going on, the gramophone would be playing tunes that would echo creepily around the church. The final kicker in my mind is that the record on the turntable would keep skipping again and again to add tension and create a real sense of unease.
Here are the assets I was working on creating.


Making these changes to the church prop layout has really revealed that the lighting will have to be tweaked because currently the alter does not read as well as it could.

10/16/25
For the past few days, I have been working on a procedural method of showing the spread of the Ivy. Luckily, I was able to find a tutorial for Blender that showed me almost exactly how to make what I wanted! Now I have a LOT of stylizing and refinement to do, as well as making a procedural leaf spreading system to go on the end of the Ivy tendrils.
Here's the tutorial I used to get this base file going.
9/27/25
The Wall environment has been a lot more interesting to work on than I was thinking. Today I have been working on "apocalypsing" the existing wall shown in my last update.
For starters, I began working on background cards. I took an image of Chicago from the city's Wikipedia page and brought it into photoshop. I removed the background and started painting in vines and greenery all over the buildings.
Once this was done, I created a png card file with a few different vine formations.

With the vines done, I then started populating the 3D buildings with the vine cards as well as putting in the city skyline cards.
(Please note: The character is just a stand-in so I would know where the focal point would roughly be.)


I then experimented with how adding atmosphere and volumetrics will affect the scene. The results were convincing.

9/26/25
The past few days I have been working on upscaling the model for the Chicago wall. I had made a previous mockup version for early Chicago look-dev, which I will put below.

Since I want this section of wall environment to be high-resolution and clean, I deleted everything but one segment of wall and began to build up the scene around the wall.
I first added geometry to the already existing segment, putting bevels and higher detail where they were needed.


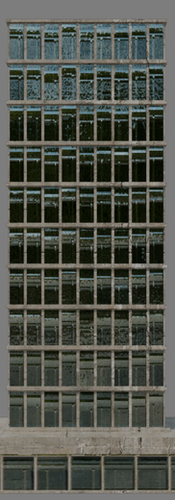
I also added higher resolution textures and building models that I created.


For the building models, I used image textures and built the geometry around the existing images. This is useful for me in that the models are incredibly lightweight because the textures carry a lot of implied detail .


9/25/25
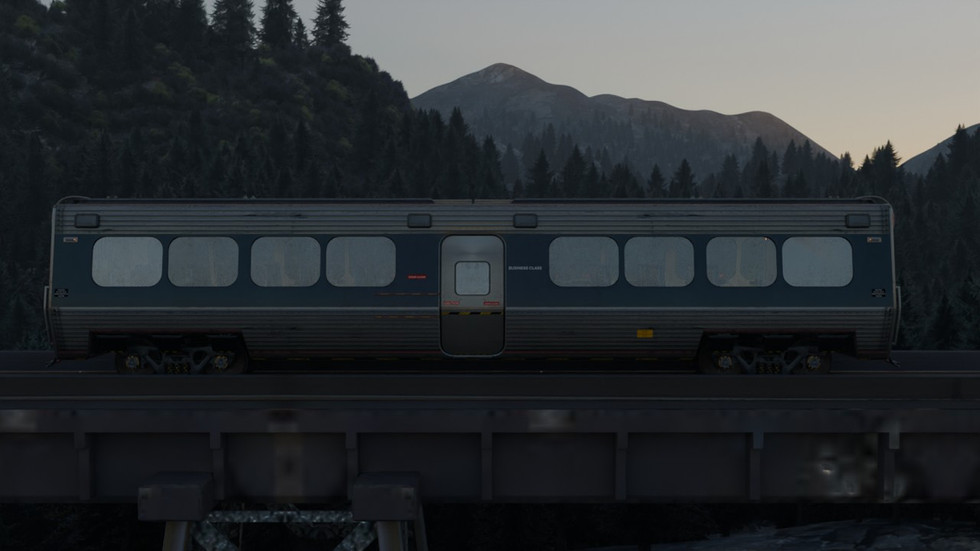
This evening I was working on setting up a tileable section of national park that our train could coast through. I used the Blender landscape extension to create some basic mountain shapes and then populated them with a png-based tree made out of alpha cards so that the level would be relatively light weight. I also modeled a section of train bridge. I figured we probably won't ever see the tracks but that it would be better safe than sorry to have it made.


Once I had a section that I was liking, I started working on some early lighting tests for what our evening lighting could be.
(Please note that the train bridge does not have the finalized texture on it and the train car is just a stand-in asset.)


9/24/25
Today I have been working on the train station for the Albuquerque segment. My reference was the real Albuquerque Amtrak station.
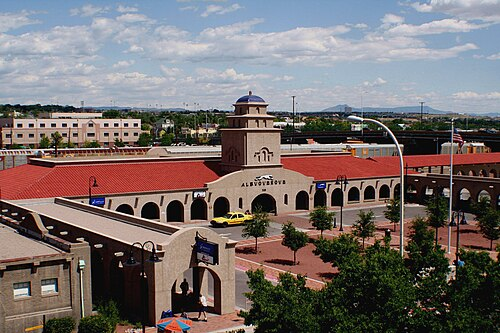
For my purposes, I didn't want to create the entire station. I decided to just focus on the front façade as well as the arched sides. I also shortened the length and width of the station by about 2 arches. My reasoning being as viewers we will never be seeing the entire station so modeling more than needed would be unnecessary.


I used the bush assets from the San Felipe church file to populate the parking lot and sidewalks with a thick layer of brush and brambles.

9/23/25
Here is an update on the church file:
I ended up creating a PNG-based method for foliage to combat the geometry load. Since our project needs to be real time, I used a method of putting cards together to create a low-impact bush. I also wanted to use plants that could feasibly be growing in the New Mexico climate:


I then imported these low-poly bushes into the church file and began to populate:


9/17/25
This week, I have been working on modeling the location of the final showdown of our film. Silent Bloom has it's final act within a church, so I chose the San Felipe church in Albuquerque as the modeling and texturing reference. Here is the real-life church:


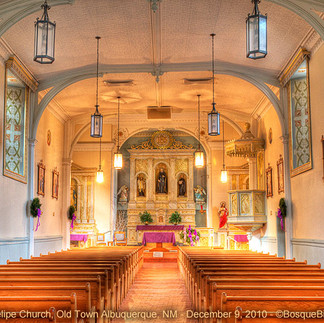
For my model, I started with blocking out the interior using custom props as well as some model stand-ins until I could create full customs for benches and painting:


The exterior received a similar treatment, I modeled out simple geometry and proceeded to make it more complex and add plant assets:


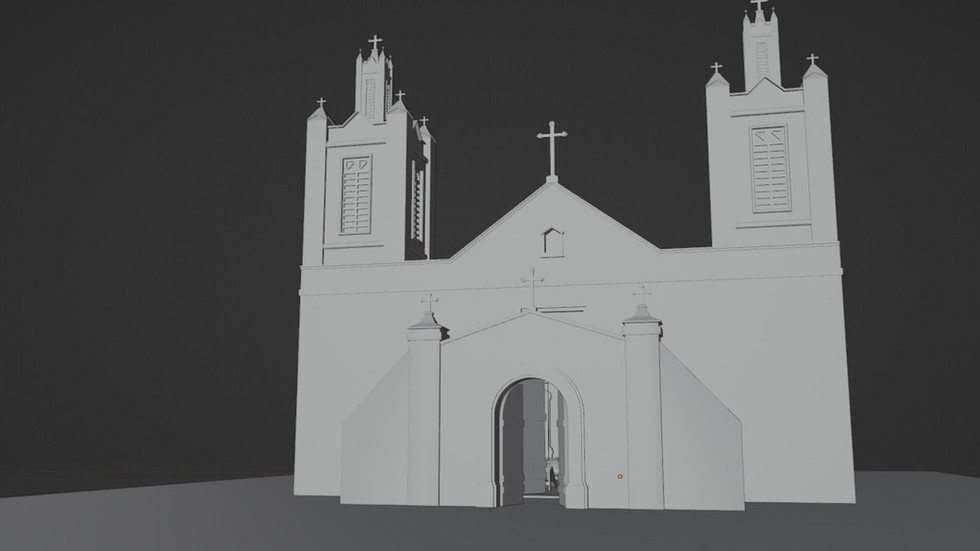


With the main parts blocked, I went back and started layering some basic materials as well as adding foliage to the interior of the church to match the world aesthetic.


9/14/25
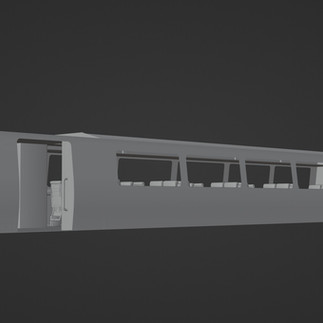
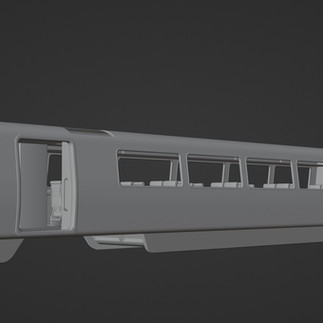
This weekend, I have been working on asset creation of a passenger train as well as level layout for a few blocks of Chicago-themed city. All of the content shown is subject to change to best suit the stylistic choices and the engine limitations of Unreal Engine 5, but for the time being my tests will be in Blender.
For the train, I needed to model out a believable interior as well as a solid exterior. I compiled a reference list and built out a multilayered generic train car. Here is a breakdown of the different layers that show off the train car.


As I also said, I worked on level design for part of the overgrown Chicago sprawl for the train ride segments. Here is a compilation of me adding assets to build out from the test level I had created.


Comments